
Setting Up Microsoft Teams Calling
Connect Microsoft Teams to the Click2Call SBC using Direct Routing so your Teams users can make and receive real phone calls on Australian numbers — no separate softphone required.
Last reviewed: August 2026
Before you begin
You’ll need Global Admin access to your Microsoft 365 tenant, a Microsoft Teams Phone Standard licence (or an E5 licence) for every user that will make calls, and comfort with the Microsoft PowerShell command line for the final step. If you’d rather we handle the setup for you, our managed setup service covers Teams Direct Routing from end to end.
What this guide covers
Microsoft Teams doesn’t connect to the public phone network on its own — it needs a Direct Routing provider on the other side of an SBC (Session Border Controller). Click2Call is that provider. This guide walks through the eight steps required to link the two: enabling the Teams profile in the Click2Call portal, adding and verifying the SBC domain in Microsoft 365, creating the trunk user, provisioning your Teams phone numbers, mapping them to users, and running the PowerShell commands that grant each user permission to place calls.
The bulk of the configuration lives in two places: your Click2Call portal at portal.click2call.com.au and the Microsoft 365 Admin Centre at admin.microsoft.com. Keep both open in side-by-side browser tabs so you can copy values between them.
Microsoft Teams Direct Routing Setup, Step by Step
Enable Microsoft Teams on your Click2Call profile
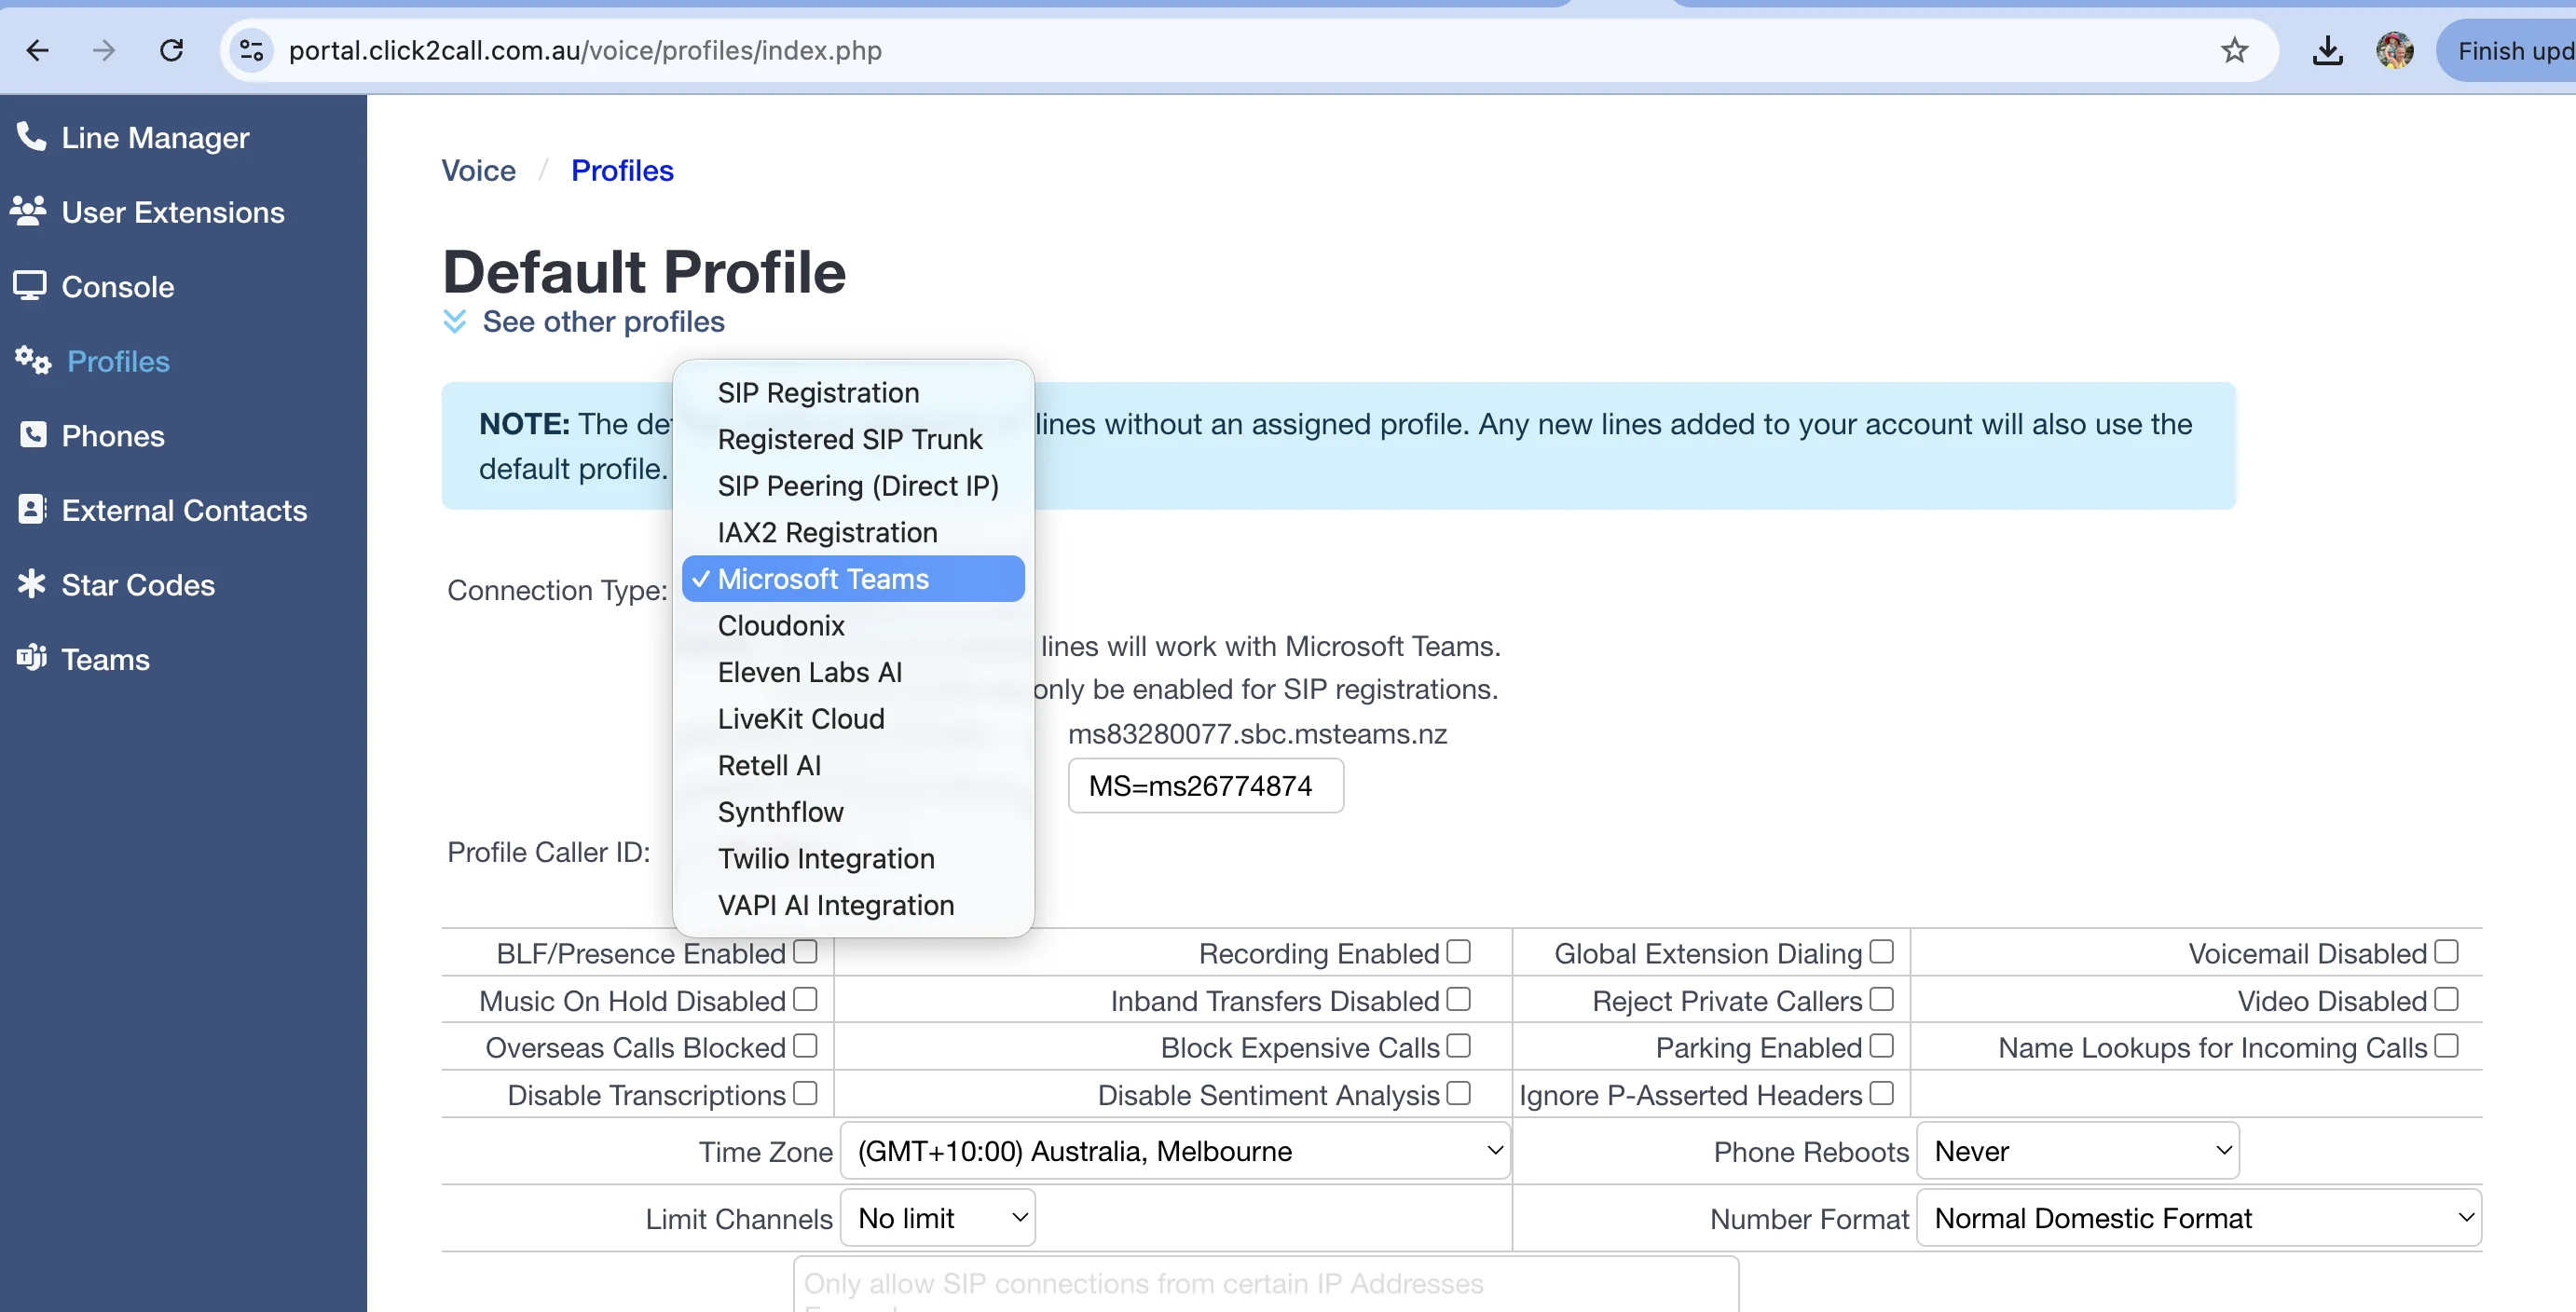
Sign in to portal.click2call.com.au and open Voice → Profiles. Either edit the Default profile or create a new one dedicated to Teams. Change the Connection Type dropdown to Microsoft Teams.
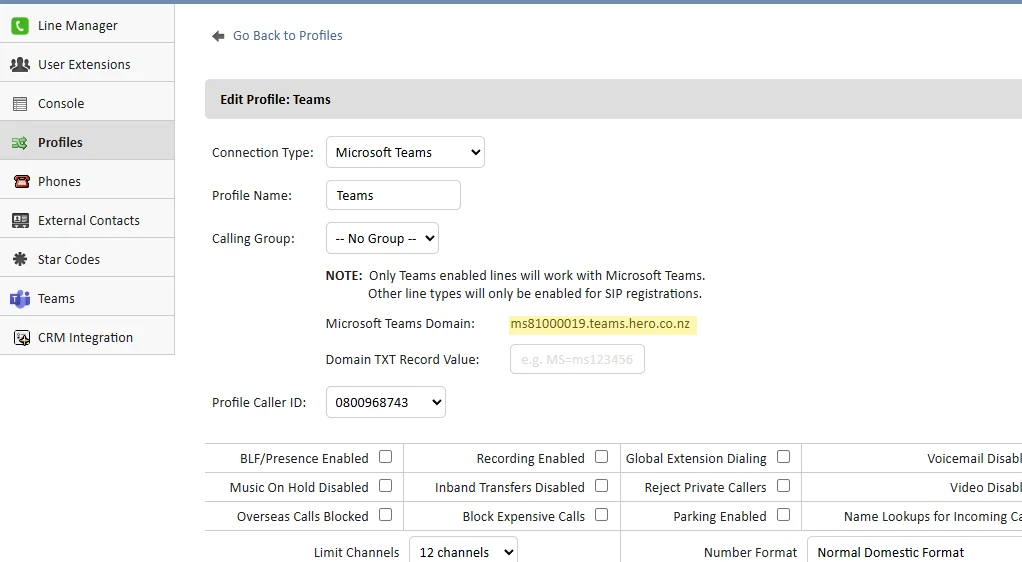
As soon as you save, the portal displays two important values on the profile:
- Microsoft Teams Domain — something like
ms{account}.sbc.msteams.nz. This is the SBC hostname that Microsoft will send calls to and receive calls from. Copy it to your clipboard. - Domain TXT Record Value — a blank field where you’ll paste Microsoft’s verification token in a moment.
Add the SBC domain in Microsoft 365
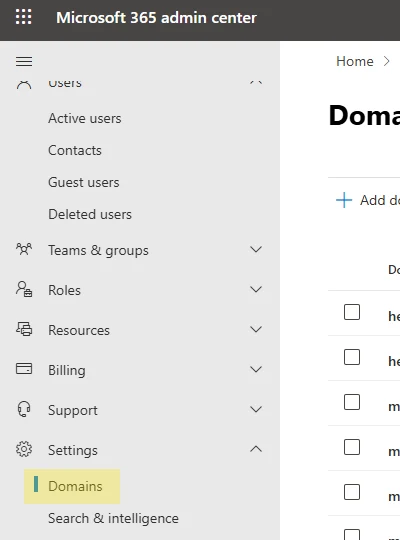
Open a new tab, sign in to admin.microsoft.com as a Global Admin, and use the left navigation to open Settings → Domains.
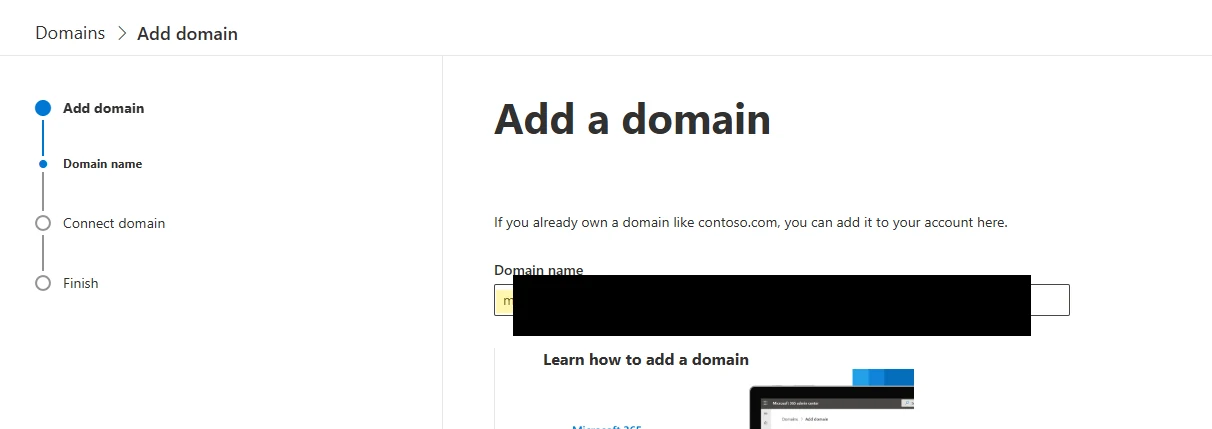
Click Add domain at the top of the domains list.
Paste the Microsoft Teams Domain you copied in Step 1 into the Domain name field, then click Use this domain.
Verify the domain using the TXT record
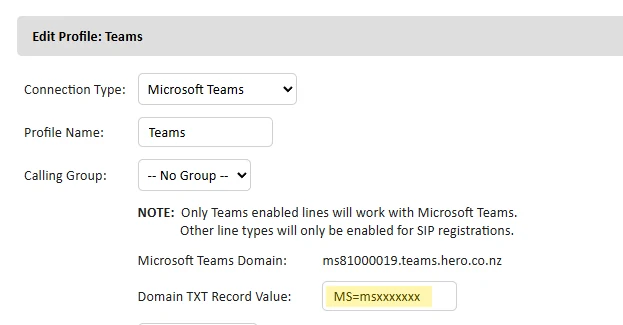
Microsoft will next ask you to prove ownership of the SBC domain by adding a TXT record to it. You’ll be shown a value that starts with MS=. Copy that TXT value.
Switch back to the Click2Call portal, paste it into the Domain TXT Record Value field on the Teams profile, and click Save Default Profile. The TXT record will be published on the ms{account}.sbc.msteams.nz domain within seconds.
Return to Microsoft and click Verify. If it fails, wait 30–60 seconds and click it again — DNS propagation is usually near-instant but occasionally lags. When the domain verifies successfully, Microsoft will offer to add online services (Exchange, SharePoint, etc.) to the domain. Leave every checkbox unticked — this domain is for Direct Routing only, not for mailboxes. Click Continue and then Finish.
Create a trunk user in Microsoft 365
Microsoft won’t attach a Direct Routing licence to a raw domain — it needs a user account on that domain to bind the licence to. The trunk user is a placeholder account that never signs in and never makes calls; its only job is to hold a Teams Phone licence against the SBC domain so Microsoft treats the domain as Teams-enabled.
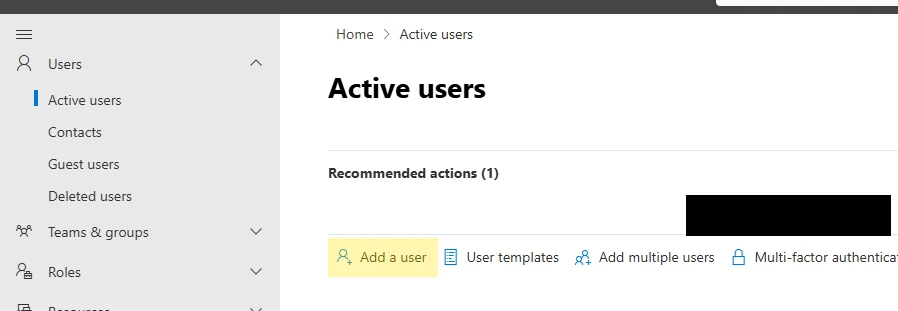
In the Admin Centre, open Users → Active users and click Add a user.
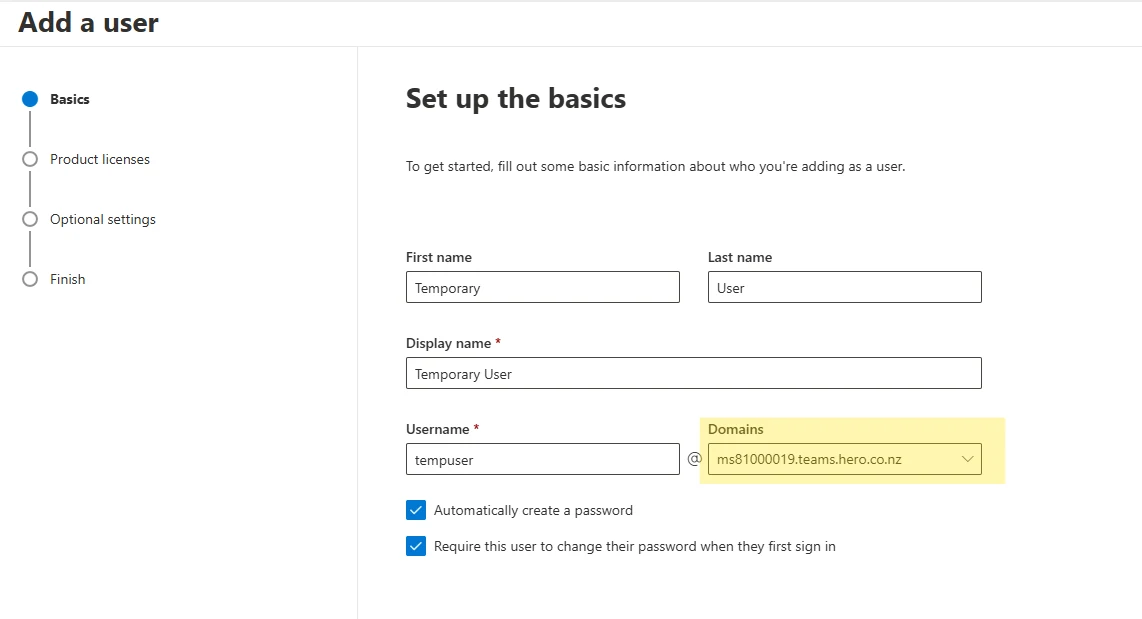
Fill in the basics. Any name will do — we use Trunk User / username tempuser. Critically, in the Domains dropdown on the right, pick the SBC domain you just added (not your regular company domain). Leave Automatically create a password and Require this user to change their password when they first sign in ticked. Click Next.
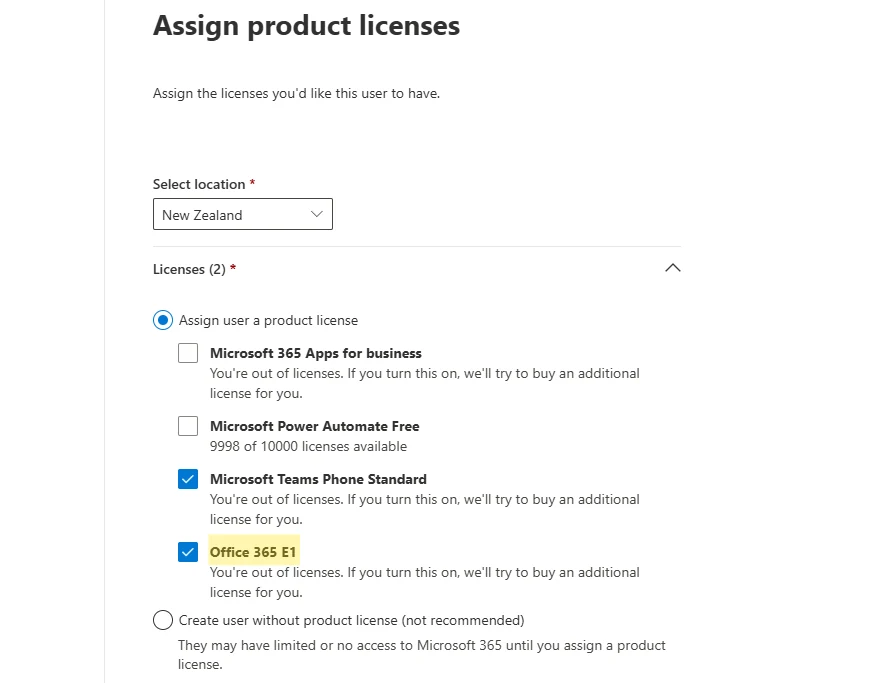
On the Assign product licenses screen, choose Australia as the location and tick both:
- Microsoft Teams Phone Standard — the licence that enables Direct Routing calling.
- A base Office 365 licence such as Office 365 E1 or higher — required as a companion to Teams Phone Standard.
If you don’t have a spare licence handy, temporarily remove one from an unused account, complete this setup, then reassign it. The trunk user only needs the licences during the initial configuration.
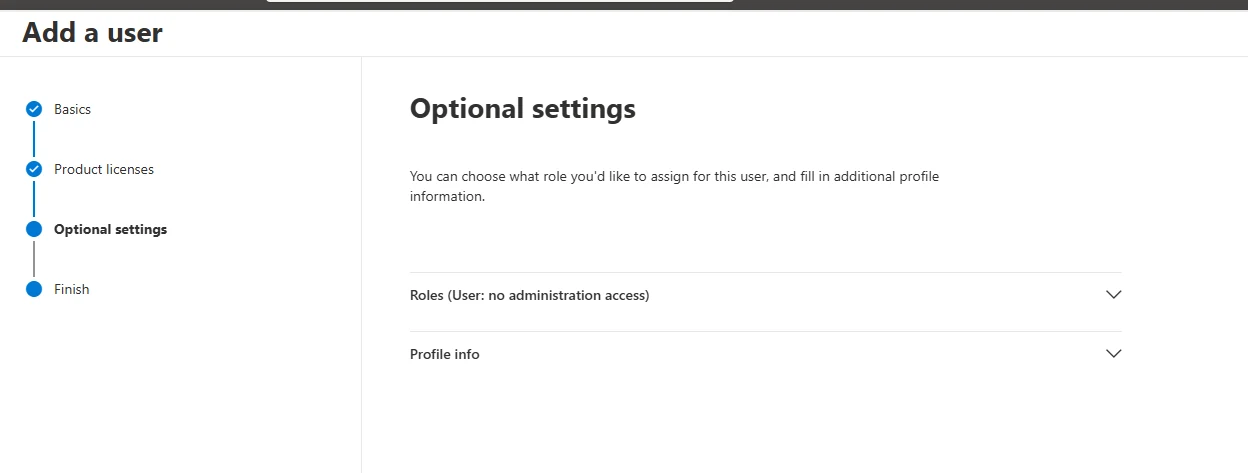
On the Optional settings screen leave both sections at their defaults (no admin role, no profile details) and click Next.
Review the summary and click Finish adding. The trunk user will appear in your Active users list within a few seconds.
Add Teams phone numbers in the Click2Call portal
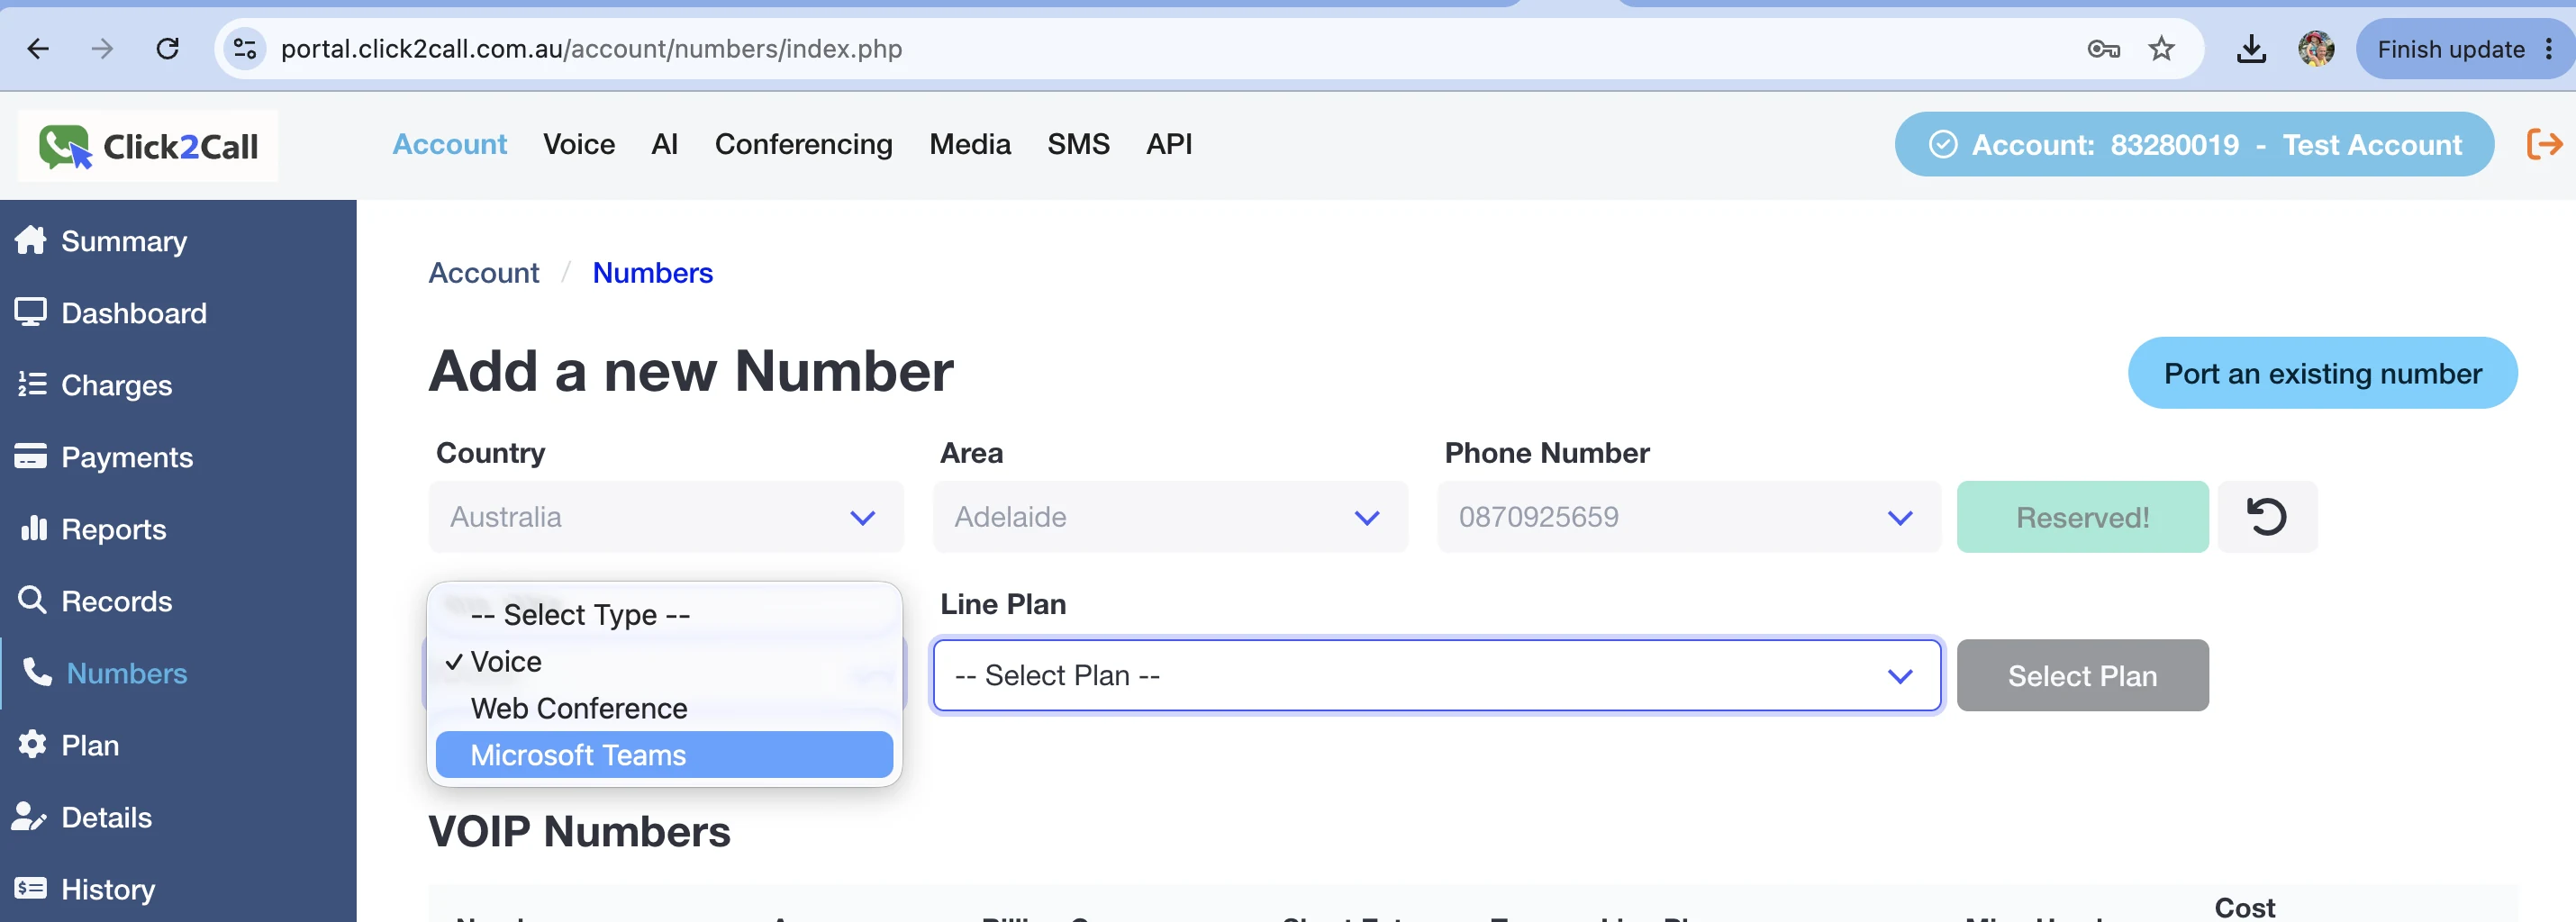
Back in the Click2Call portal, open Account → Numbers and click Add a new Number. For each Teams user you’re setting up, choose Australia as the country, pick an Area (Sydney, Melbourne, Brisbane, Perth, Adelaide, etc.), and — the important bit — choose Microsoft Teams from the Line Type dropdown. Select a Teams plan and confirm the reservation.
If you’re porting existing numbers rather than picking new ones, use the Port an existing number button and mark the port request as a Teams line when prompted. See Porting a number to Click2Call for the full porting flow.
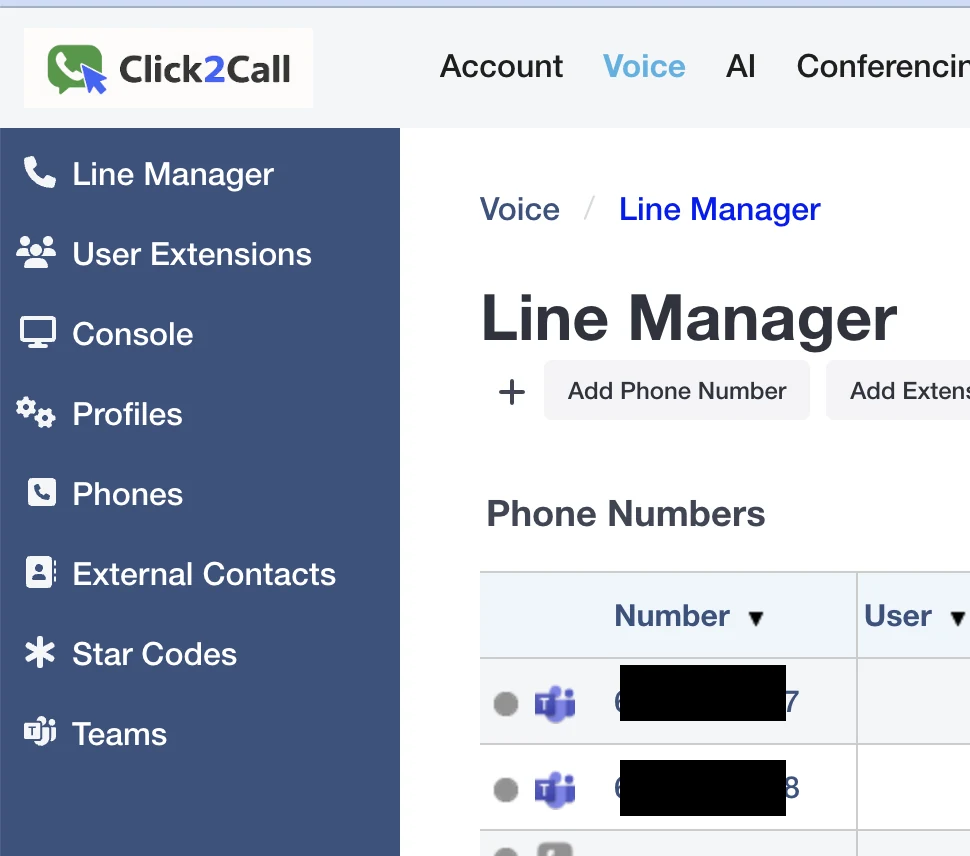
Repeat for every Teams user. When you’re done, open Voice → Line Manager and confirm each Teams line has a small blue Teams icon next to it. If the icon isn’t showing, edit the line and check that its Profile is set to your Teams-enabled profile from Step 1.
Map Teams numbers to Teams users
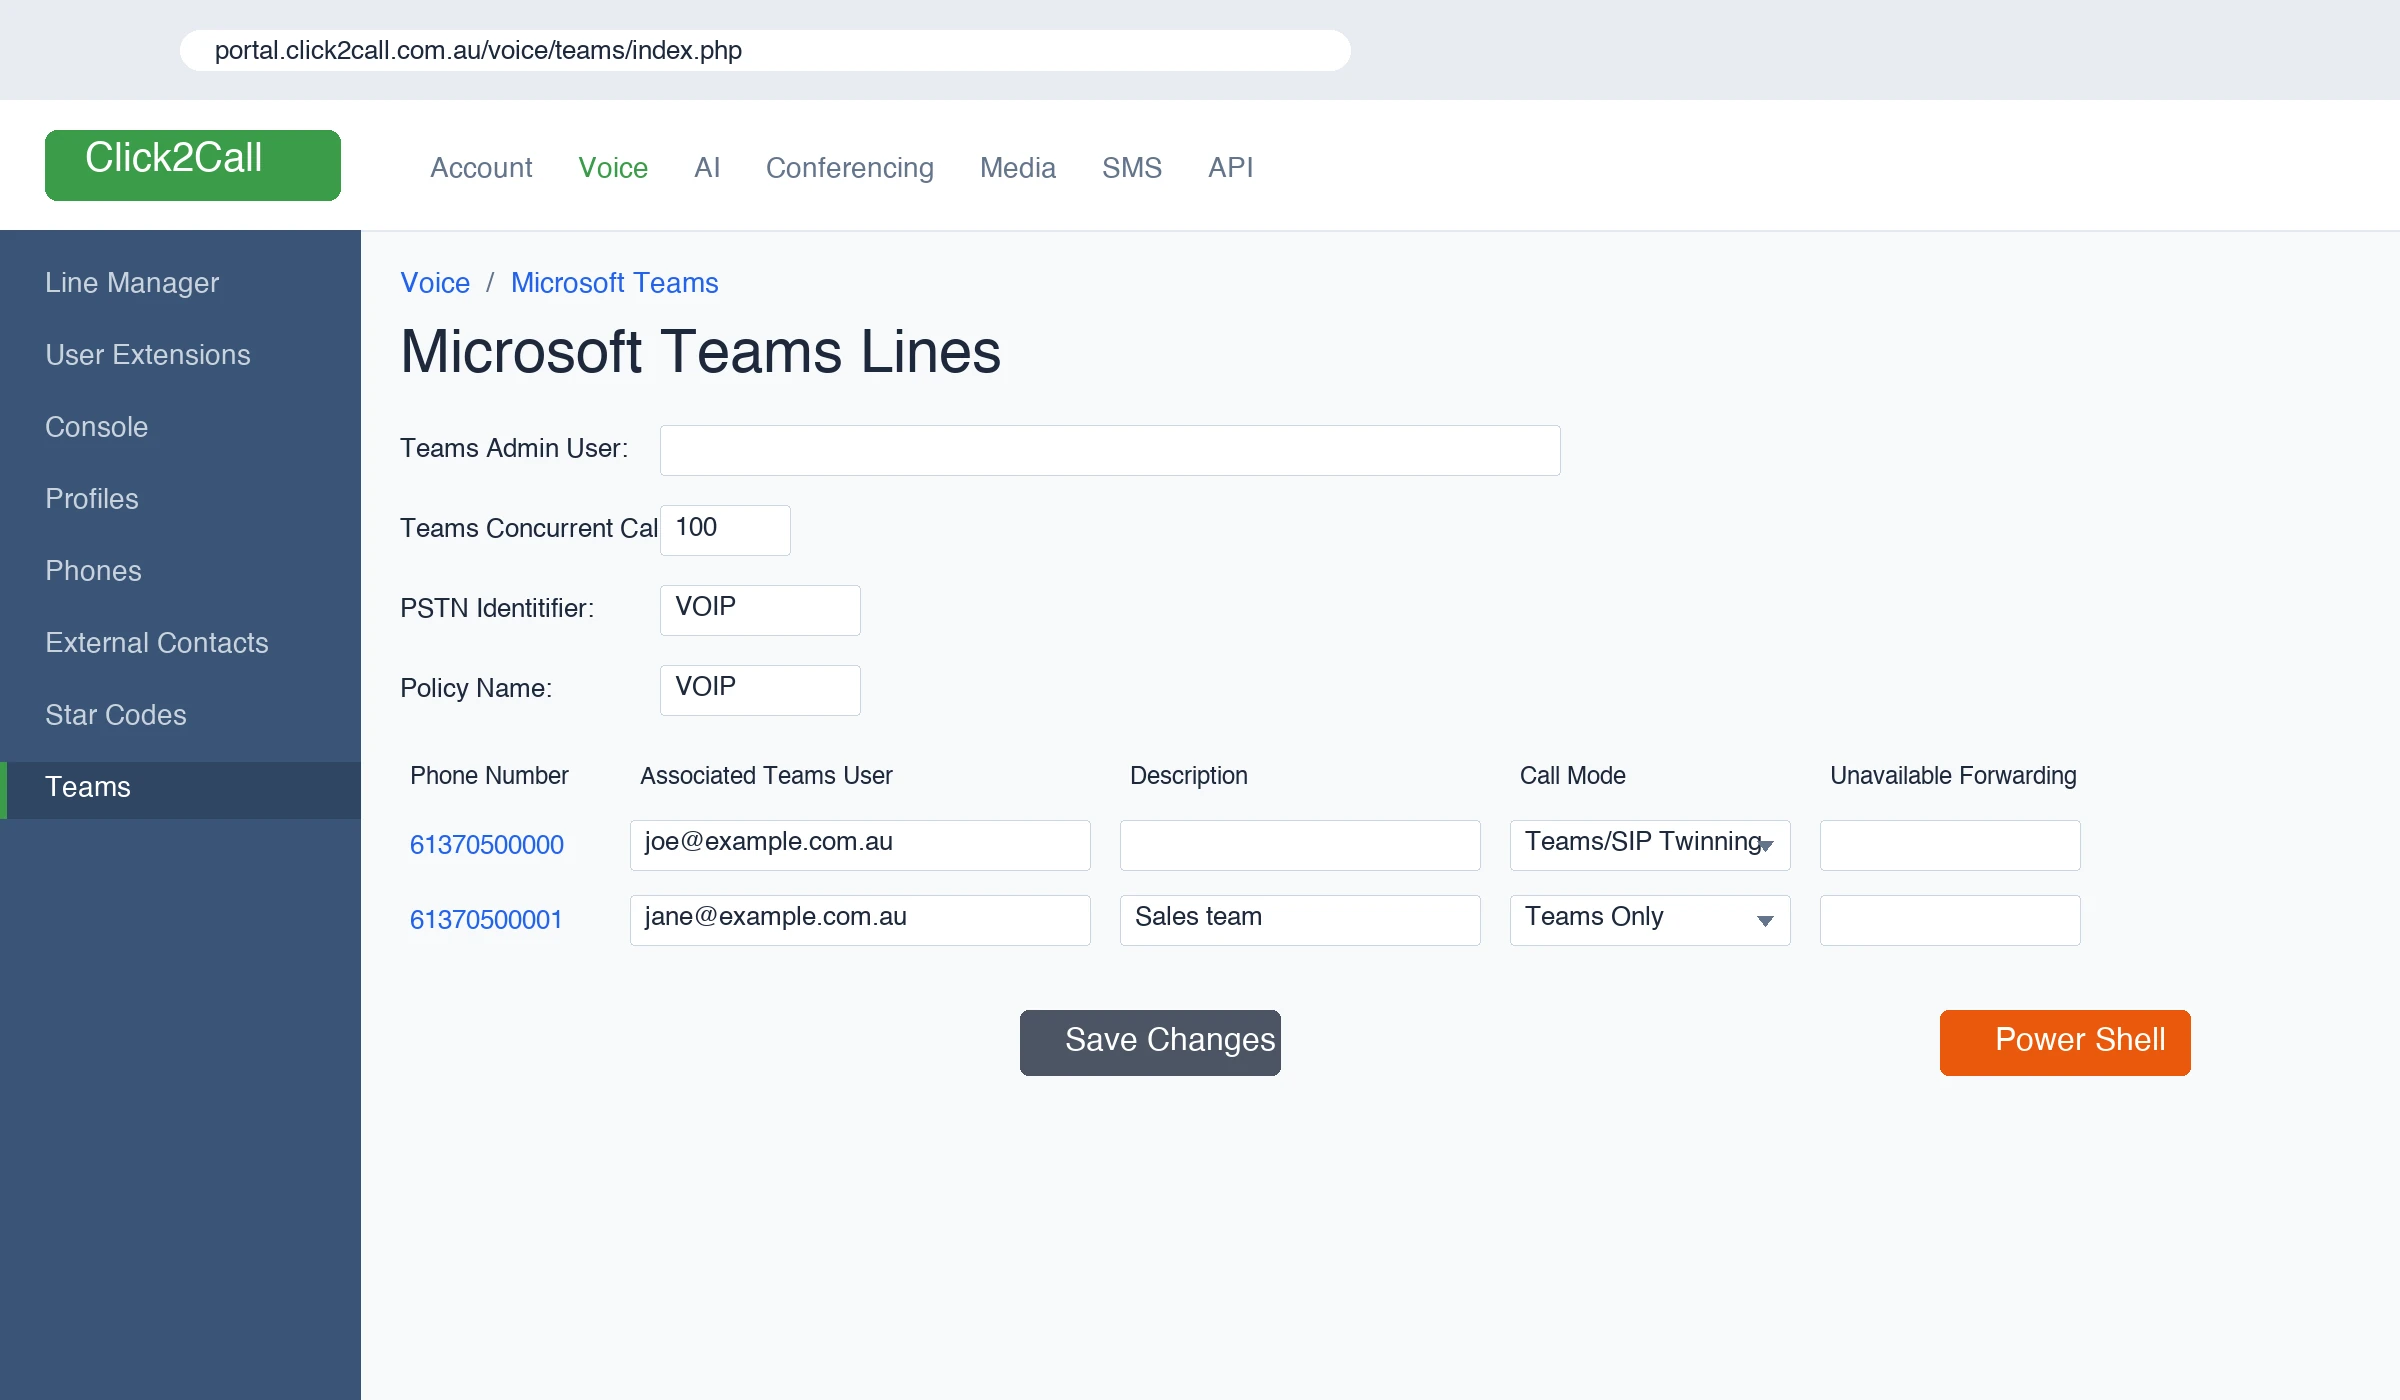
Open Voice → Microsoft Teams in the Click2Call portal. You’ll see a table listing every Teams-enabled number on your account, with an Associated Teams User field next to each.
For each row, enter the Microsoft 365 email address of the user who should own the number — the same email they use to sign in to Teams (e.g. [email protected]). Then choose a Call Mode:
- Teams Only — calls ring only in the Teams app. Simplest and recommended for most users.
- Teams/SIP Twinning — calls ring in Teams and on a paired SIP device (desk phone or softphone). Useful when a user has both a physical phone and Teams.
Optionally set an Unavailable Forwarding Number (where calls go if Teams is offline) and a Failover Forwarding Number (a backup like a mobile). Leave Teams Voicemail enabled unless the user prefers the Click2Call voicemail system. Click Save Changes.
Run the PowerShell commands
The final piece connects the two sides. Microsoft needs to be told (a) that your SBC exists and is authorised to carry calls, and (b) which users are allowed to route their calls through it. That happens via PowerShell.
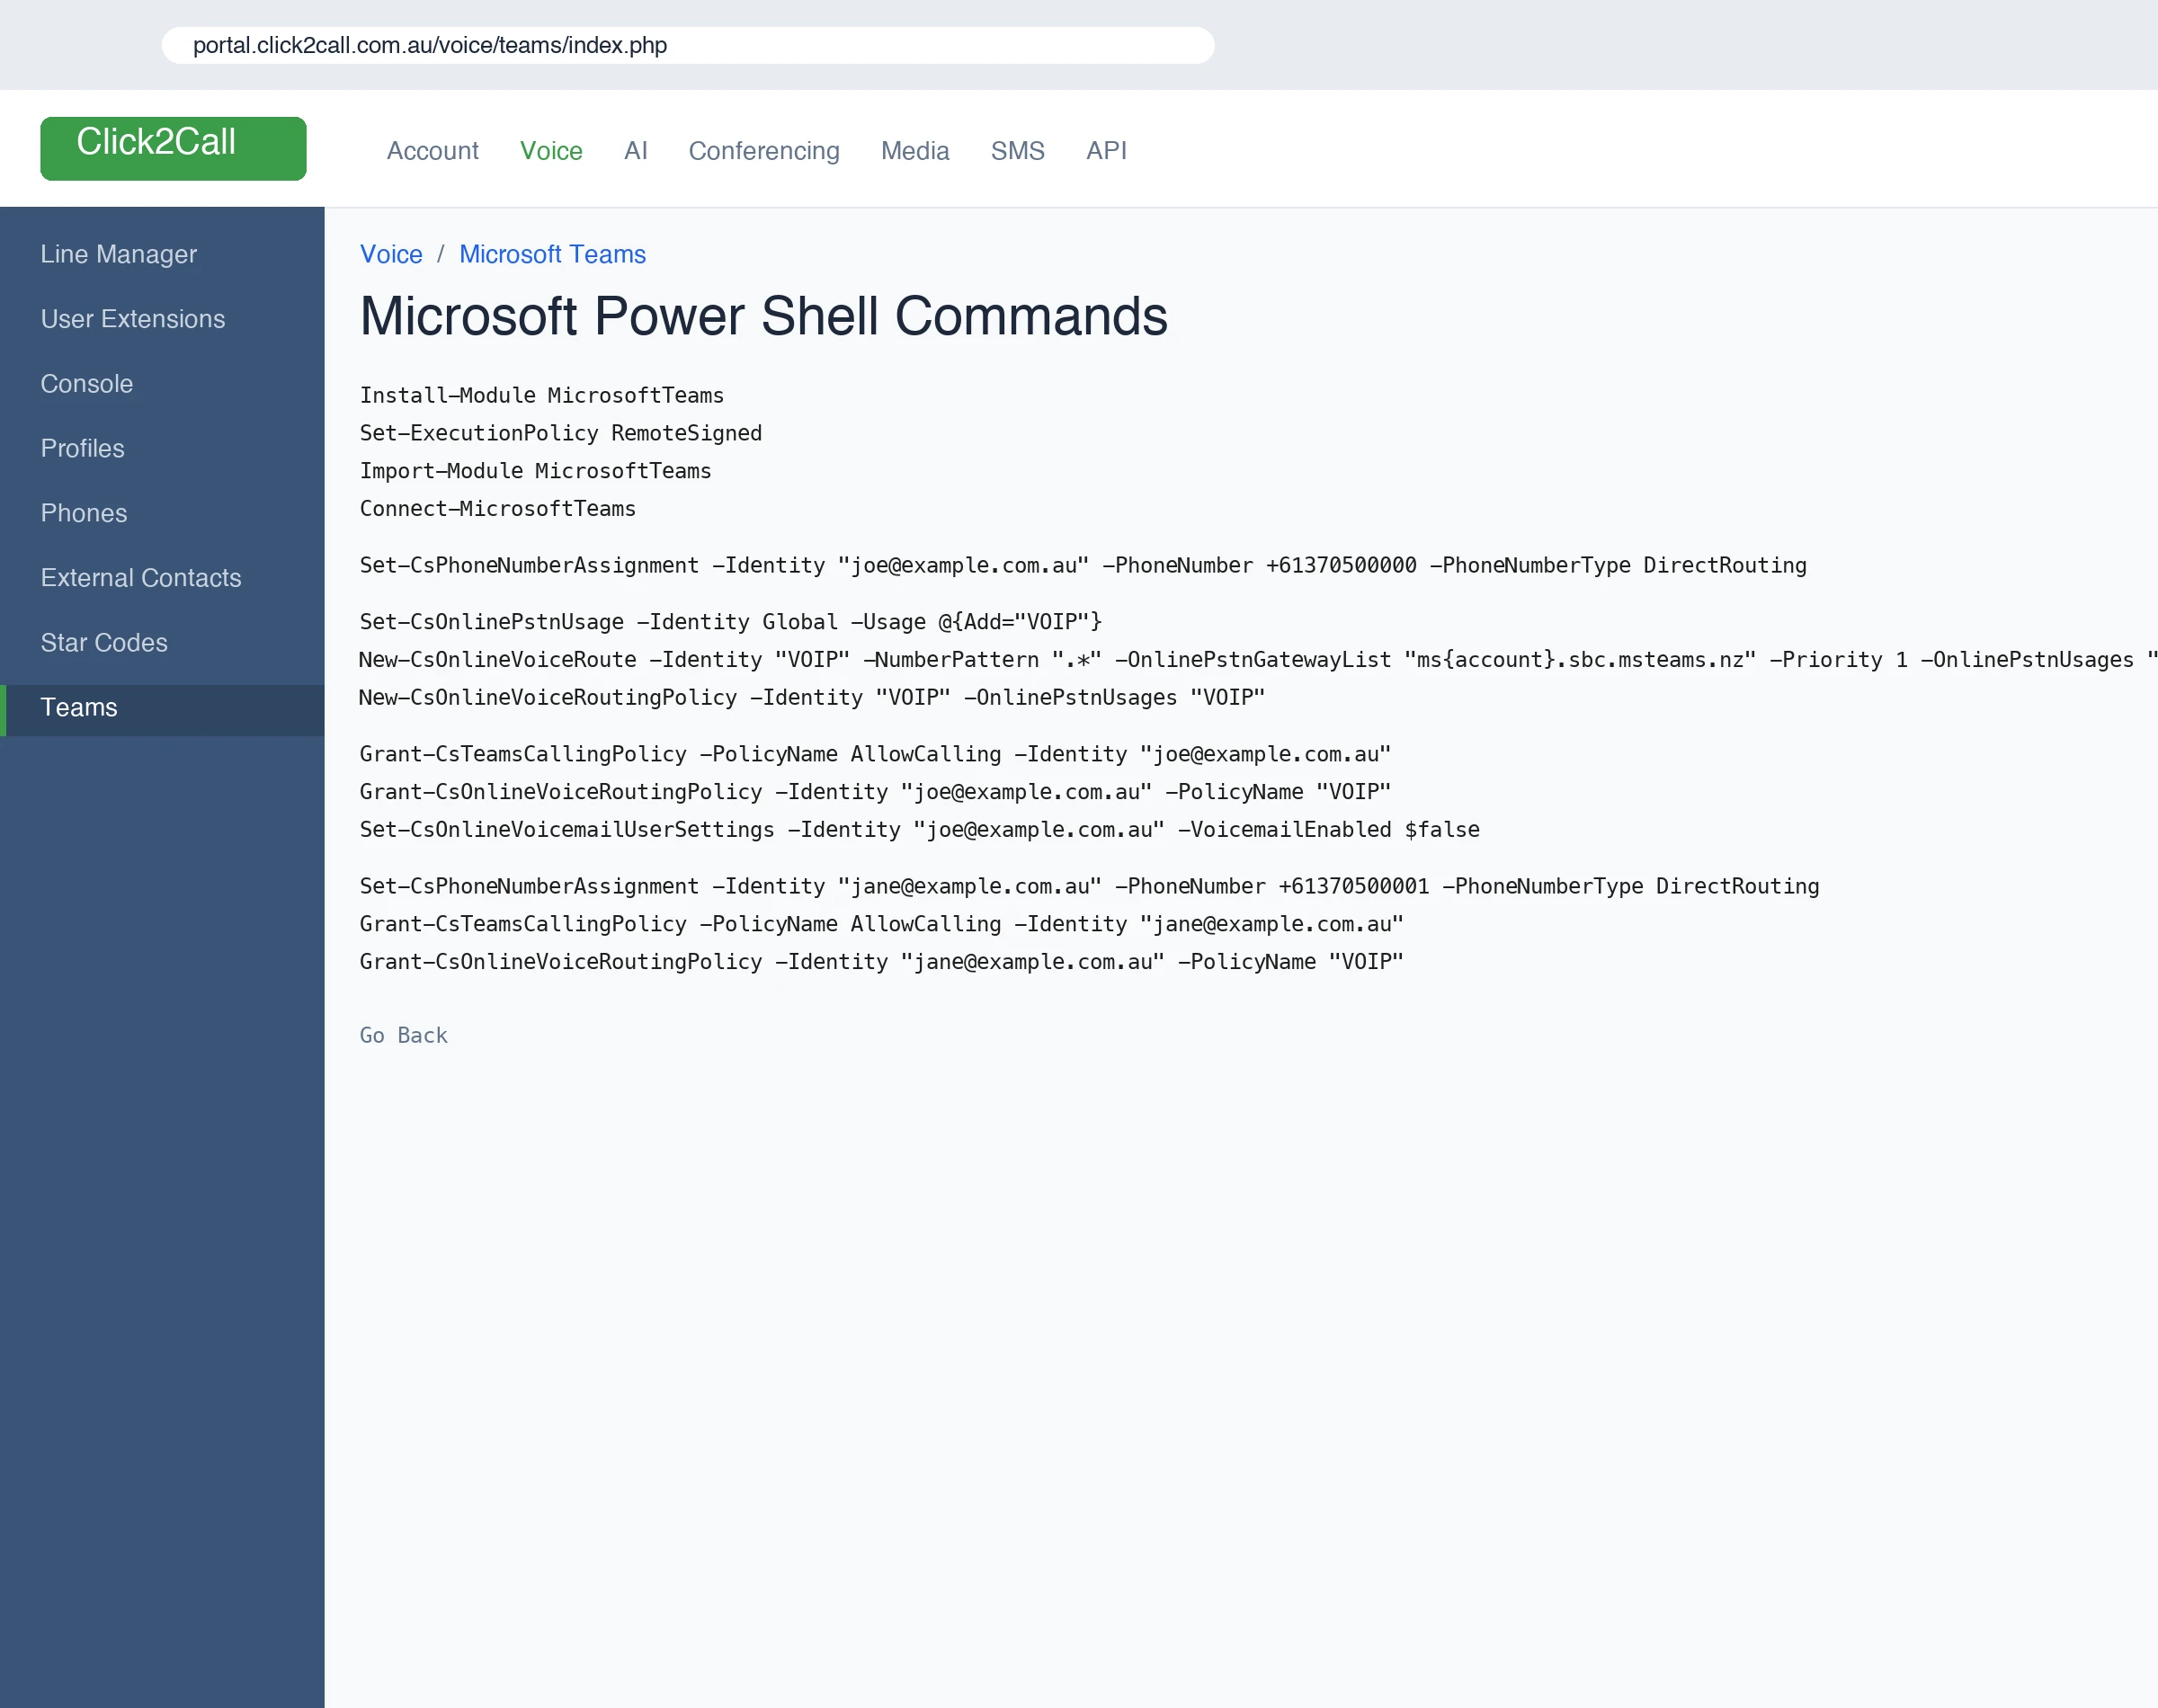
Click the orange Power Shell button on the Microsoft Teams Lines page. The portal generates the exact commands you need to run, pre-filled with your SBC hostname, each user’s email address, and their assigned phone number in E.164 format.
Prepare PowerShell
On a Windows machine, open Windows PowerShell as Administrator (right-click → Run as administrator). Then run these four commands one at a time. The first three only need to be run once per machine.
Install-Module MicrosoftTeams
Set-ExecutionPolicy RemoteSigned
Import-Module MicrosoftTeams
Connect-MicrosoftTeams
When Connect-MicrosoftTeams prompts, sign in with your Global Admin credentials. If PowerShell asks about installing from an untrusted repository, press A to accept all.
Tenant-level commands (run once)
These three commands tell Microsoft that Click2Call’s SBC is a valid PSTN gateway for your tenant. Replace ms{account}.sbc.msteams.nz with your actual SBC hostname from Step 1. You only run these once per tenant.
Set-CsOnlinePstnUsage -Identity Global -Usage @{Add="VOIP"}

New-CsOnlineVoiceRoute -Identity "VOIP" `
  -NumberPattern ".*" `
  -OnlinePstnGatewayList "ms{account}.sbc.msteams.nz" `
  -Priority 1 `
  -OnlinePstnUsages "VOIP"

New-CsOnlineVoiceRoutingPolicy -Identity "VOIP" -OnlinePstnUsages "VOIP"
Per-user commands (run for each Teams user)
For each user you want to enable calling for, run this block. Replace the email address and phone number with your own values. Numbers must be in full E.164 format — +61 for Australia, no leading zero, no spaces (so 03 7050 0997 becomes +61370500997).
Set-CsPhoneNumberAssignment `
  -Identity "[email protected]" `
  -PhoneNumber +61370500997 `
  -PhoneNumberType DirectRouting

Grant-CsTeamsCallingPolicy `
  -PolicyName AllowCalling `
  -Identity "[email protected]"

Grant-CsOnlineVoiceRoutingPolicy `
  -Identity "[email protected]" `
  -PolicyName "VOIP"

Set-CsOnlineVoicemailUserSettings `
  -Identity "[email protected]" `
  -VoicemailEnabled $false
The last command is optional — only include it if the user prefers voicemail to route to Click2Call rather than Teams. Leave it out to keep the standard Teams voicemail.
The exact block for your tenant and users, with values pre-filled, is generated on the Power Shell page in the Click2Call portal — copy from there rather than typing by hand.
Test the setup
Sign in to Teams (desktop or mobile) as one of the configured users. The dialpad should appear under Calls in the left sidebar — if it doesn’t, sign out and back in to force Teams to pick up the new voice routing policy. This can take up to 10 minutes after running the PowerShell commands.
Two quick tests:
- Outbound: dial an external Australian mobile from the Teams dialpad. Confirm it rings out and the caller ID shown on the receiving phone is the Click2Call number assigned to this user.
- Inbound: from a different phone, call the Australian number you assigned to the user. Confirm Teams rings and the call connects when answered.
If both work, you’re done. Repeat Steps 5–7 whenever you add another user.
Common issues
Domain verification keeps failing
Confirm that you’ve saved the TXT value in the Click2Call portal — nothing gets published until you click Save Default Profile. If it’s saved and verification still fails, wait a full minute and retry. The value must include the MS= prefix exactly as Microsoft displayed it.
Teams dialpad doesn’t appear for the user
Three things to check: the user has a Teams Phone Standard licence assigned, the Grant-CsTeamsCallingPolicy and Grant-CsOnlineVoiceRoutingPolicy commands ran without error, and the user has signed out and back in. Policy changes can take up to 10 minutes to propagate in Teams.
Outbound calls fail immediately with a busy tone
Usually this means the Voice Routing Policy didn’t make it to the user. Re-run the two Grant- commands from Step 7. If it still fails, check that the PSTN Gateway hostname in New-CsOnlineVoiceRoute matches the SBC domain exactly (a typo here is common).
Inbound calls ring the wrong Teams user
The number-to-user mapping lives in the Click2Call portal (Voice → Microsoft Teams), not in Microsoft. Re-open that page and confirm the phone number is next to the correct Associated Teams User email.
We’re moving from Skype for Business to Teams
The Skype for Business Online service was retired by Microsoft in July 2021. If your tenant still has Skype for Business enabled, complete Microsoft’s Teams upgrade before starting this guide — see Microsoft’s Teams upgrade documentation.
Related guides
Prefer we handle the setup?
Our Australian team can complete the whole Teams Direct Routing configuration end-to-end — SBC, licences, PowerShell, testing.