
How to Ring Your Phone First, Then Let the AI Take a Message
The Answer Agent is a smart replacement for voicemail. Your phone rings first, and if you cannot get to it the AI answers in a natural voice, asks for the caller’s name, number and reason for calling — waiting for each answer — and emails you the details with a transcript. You can write its introduction and questions yourself and pick the voice.
Last reviewed: September 2026
Setting Up the AI Answer Agent, Step by Step
Decide how long your phone rings first
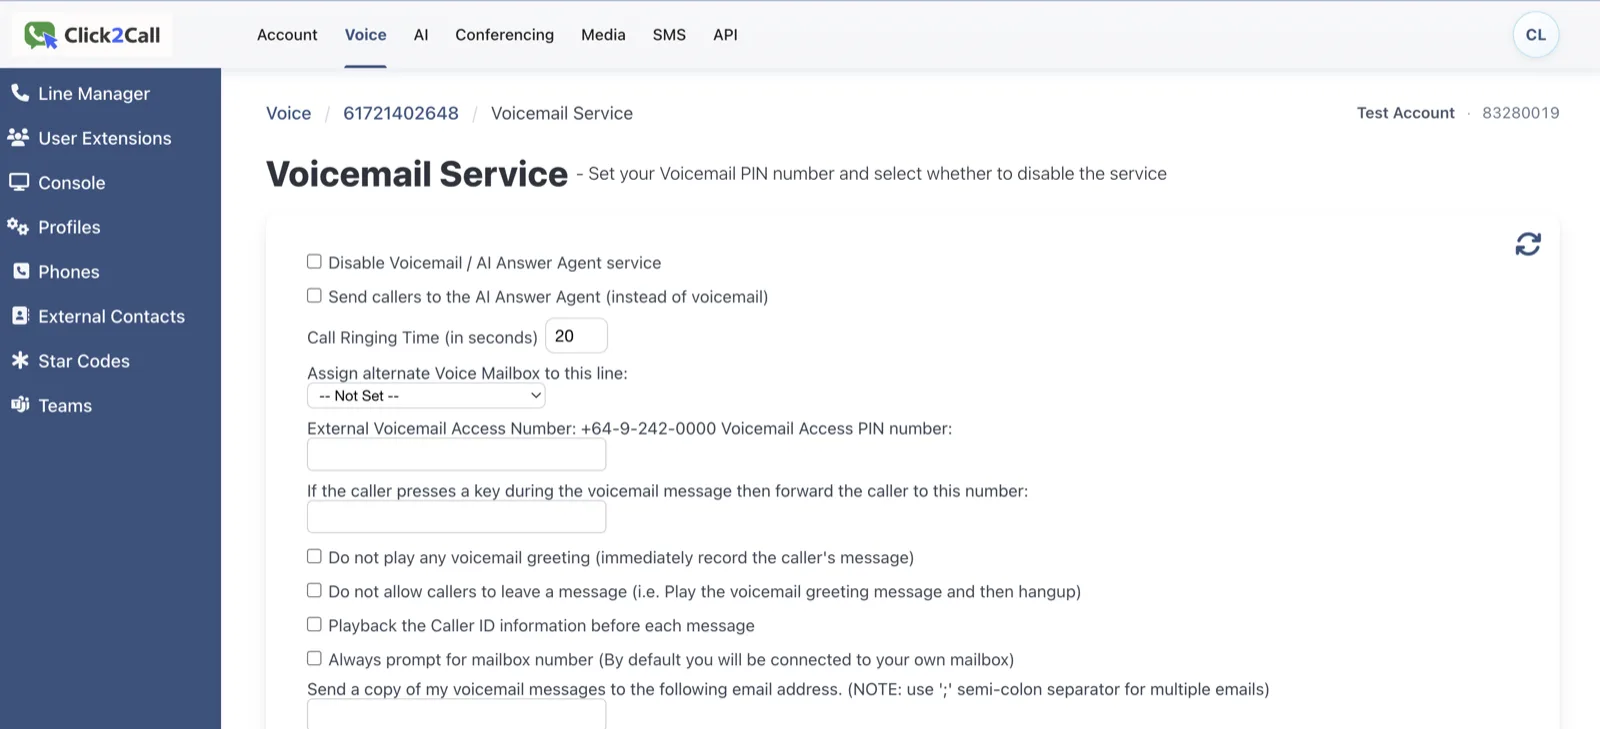
Go to Voice → Line Manager and click your number to open its Call Flow page. Open the Incoming Calls dropdown and choose Voice Mail. Set Call Ringing Time (in seconds) to how long you want to be able to answer before the AI picks up — the default is 20 seconds. On the same page, tick Send callers to the AI Answer Agent (instead of voicemail), then save.
Tell it where to email the messages
Still on the Voice Mail page, enter your email address in Send a copy of my voicemail messages to the following email address (use a semicolon between several addresses). This is the address your call summaries and transcripts are delivered to. You can also set a per-number address in the Line Email column on the Line Manager page.
Create your business profile
Go to AI → Answer Agent (Beta) and click Create Business Profile. This holds your business details so the agent can answer simple questions about you. If you only want it to take messages, you can keep the profile brief.
Choose the mode and the voice
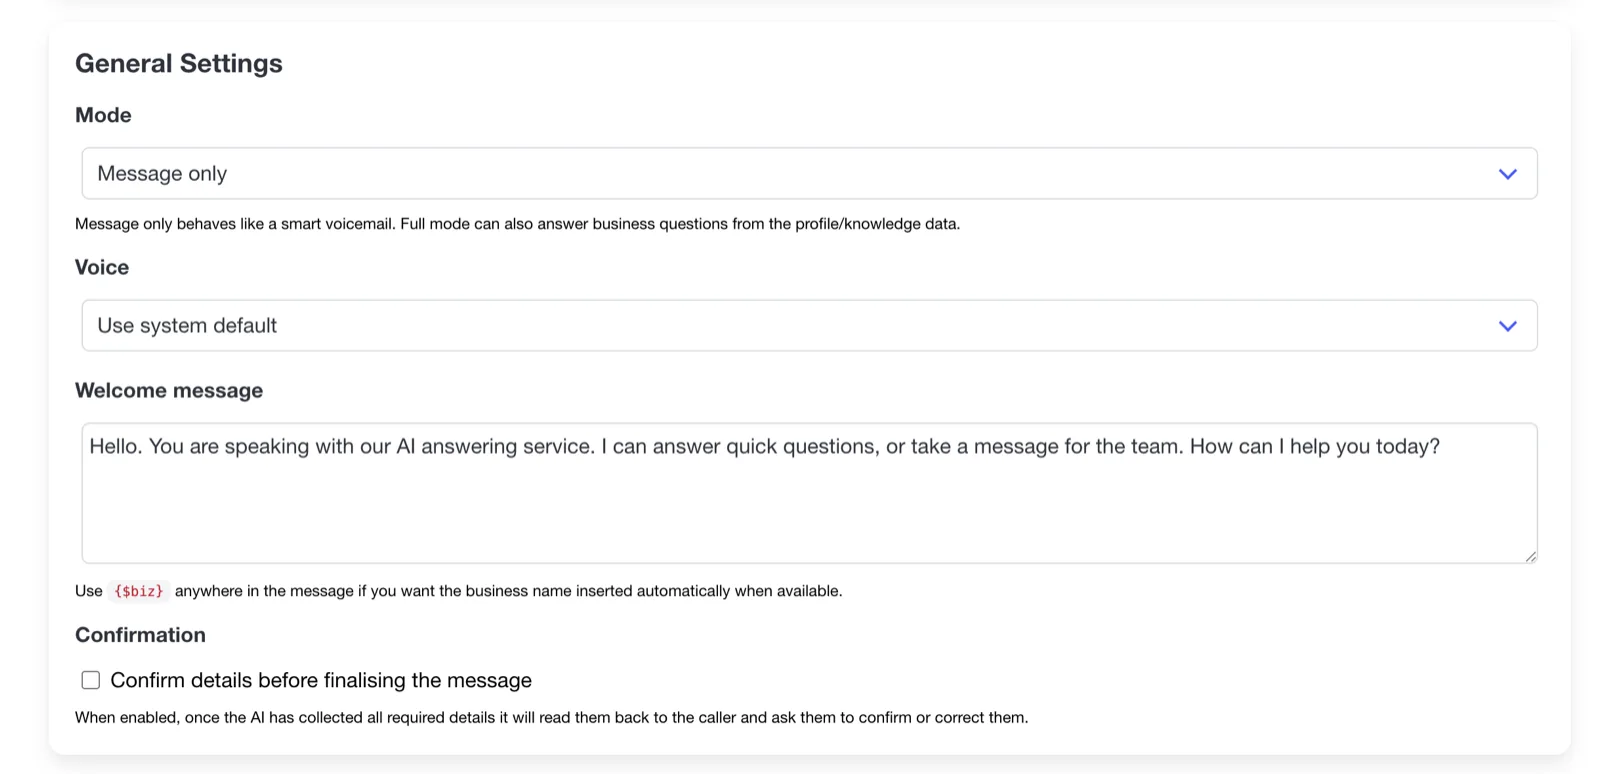
On the General tab, set Answering mode to Message only if you just want a smart message-taker, or Answer questions and take messages if it should also answer questions from your business profile. Then pick a Voice actor and click Generate preview to hear it before you save.
Write your introduction
The Welcome message box is your introduction — replace the default with your own wording, for example: “Hi, you’ve reached Kat at Acme. I’m Maggie, her virtual assistant. Kat can’t get to the phone just now — may I take a few details and she’ll get back to you?” Type {$biz} anywhere in the message to have your business name inserted automatically.
Choose the questions it asks
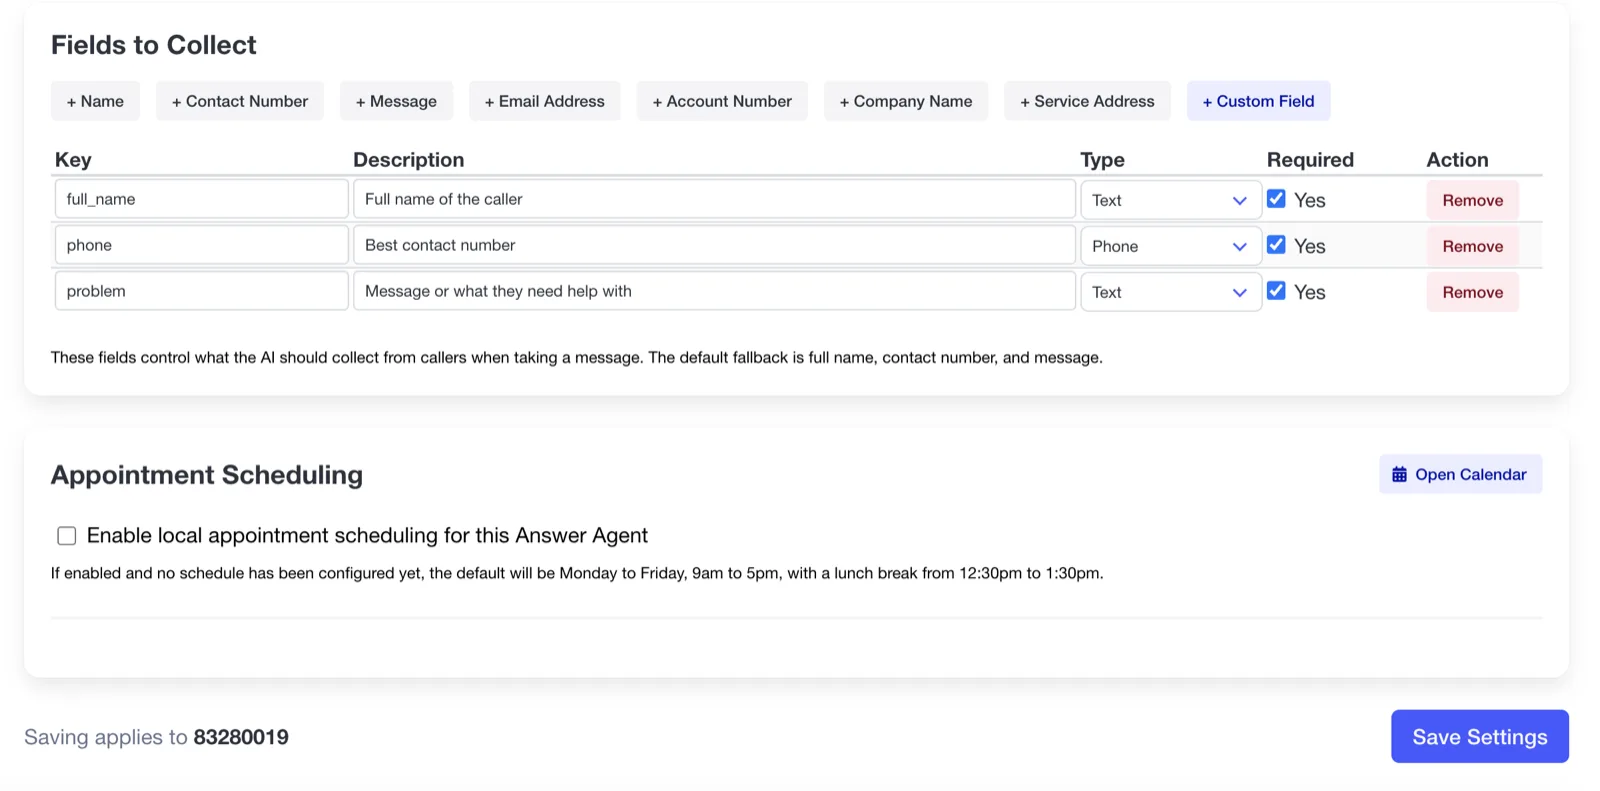
Under Fields to Collect, each row is one question the agent asks, and it waits for an answer before moving on. The defaults are exactly what most businesses want: Full name of the caller, Best contact number, and Message or what they need help with. Edit the wording in the Description box to change how a question is asked, set the Type (Text, Email, Phone or Appointment), tick Required, and use the buttons above the table to add Email Address, Account Number, Company Name, Service Address or a Custom Field.
Set the closing behaviour and save
Tick Confirm details before finalising the message if you want the agent to read the details back to the caller and confirm them before it finishes — this is how the closing works; there is no separate closing script to write. Optionally enable Appointment Scheduling further down if you want callers to be able to book a time. Click Save Details. Your messages will now arrive by email, and each call is also listed under AI → Recordings with its transcript and summary.
Still need help?
Our Australian support team is available to assist you.